Showing posts with label garden. Show all posts

Friday, June 17, 2016

My Garden


My garden is in full swing this summer. I planted tomatoes, squash, beans,  corn, sunflowers and watermelon. I had to pull all the beans up because they were not growing at the proper rate and looked like they were dying anyway. I am going to try a different technique next summer when I plant the beans because this is the second year in a row that all my beans have died. Check out my pictures below.....


                                                             Tomatoes


                                                            Sunflower

                                                             Sunflower

                                                         Watermelon

                                                            Tomatoes

                                                          Sunflowers

                                                               Squash

                                            Corn

Thursday, May 12, 2016

Mesmerized By Its Beauty

The last few years I have watched this flower grow and it still mesmerizes me every time!!  It grows in layers and it is truly amazing how the layers are different colors and how beautiful it is when it is finished.  They multiple as well and that is always a great thing, my aunt said that's what happened with hers; but when they did they changed colors.. that is really cool! She has two different ones in her's that are huge now, this one and another that blooms orange and yellow.  I think the yellow and pink are prettier though! I really wish I knew what they were called where I could plant some of these in my yard!

They start out like a bunch of little diamond shapes and then one layer at a time the diamond shapes become petals... check out the different stages of the growth and see how amazing it is as it happens!!


 Isn't this cool?  I sure think so!!!

If anyone happens to know what these are called please let me know because as I mentioned, I'd love to get me some to go around my pond!  Thanks.


Sunday, March 20, 2016

Love seeing the Flowers Bloom

Last week was beautiful here in North Carolina, but today is a little on the chili side!!  It's so nice to see all the flowers and trees blooming as I have ventured out last week... I just wish mine would begin to bloom :(

I purchased a few boxes of wild flower seeds last year and never planted them, but plan to after this cold spurt moves past us this week.


I don't have much of a "green-thumb" so I like to go with flowers that are easy to keep alive and come back every year (lol).

I plan to plant these around my well that is next to my fish pond.  I already have a few flowers that are there that return yearly, but they don't bloom long and wanted to add something that does.  Here is a picture of the current ones in bloom last year...


Hopefully they will come back just as beautify this year!  Last year, surprisingly, the orange-looking flowers multiplied and there were yellow ones; so, I am hoping that they will return as well.

Can't wait for them to start where I can share pictures with you all.. I love Spring and all the beautiful flowers bloom this time of year!!

Tuesday, March 8, 2016

Papa's Garden Today

In my last post, Papa's Garden Destroyed in the Storm, I promised that I was show how we decided to redo the fish pond after the hurricane uprooted trees and destroyed the progress we had made!!

If you have been following the fish pond progress from the beginning you'll know that we have been using the thick black plastic liner in previous versions; however, when we went to Lowe's to get it they didn't have it in stock.  We chose to get the white vinyl instead, thinking it would be just as good (later I will tell you why this wasn't a good idea).


Once we had everything we needed to get started, we removed our fish and put them in a large tote with some of the water from the pond a some fresh water.


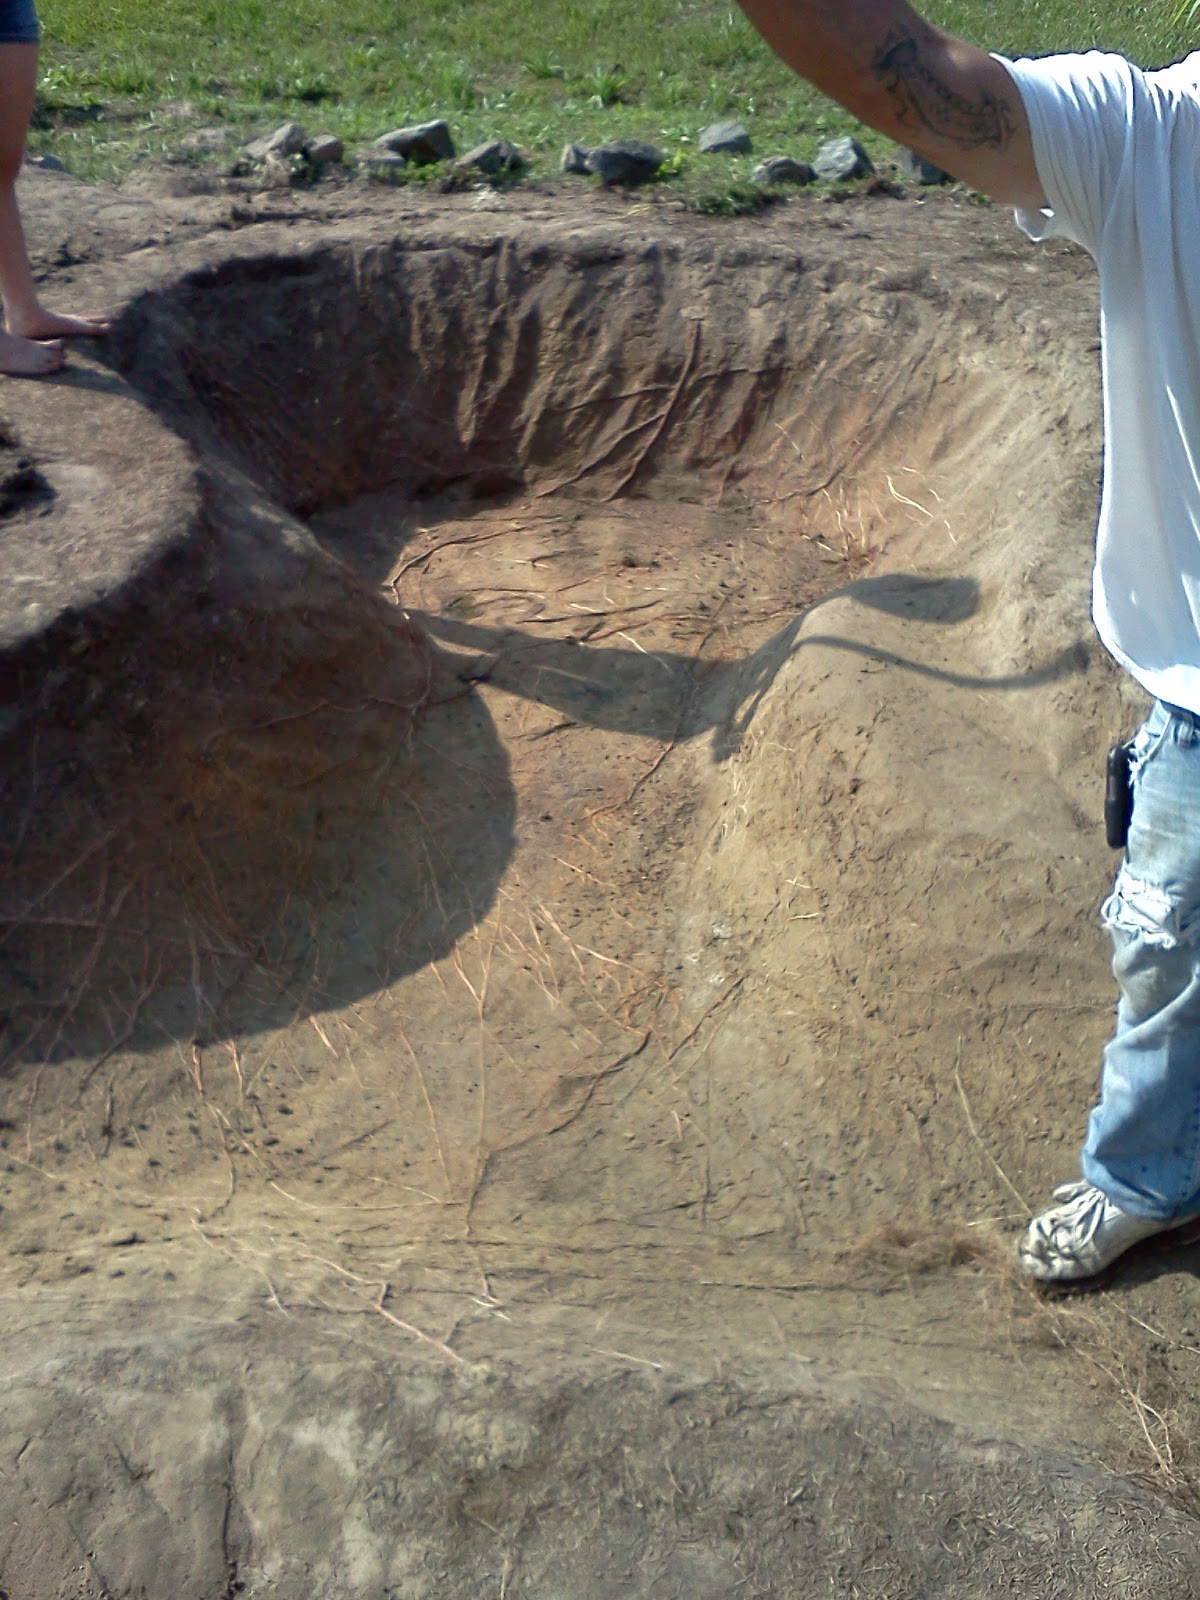
When we pulled up the black liner the ground looked really cool with the roots slightly showing through the dirt.

My youngest daughter said that it looked like veins (lol), but it really did look like that in a way..

Don't ya think?


Once we rolled the plastic out and ready to start filling it up, we went ahead and put the fish back into their home.

We just poured the water that they were in into the pond, this way there is less of a shock to them; and less fish will die in the process!

I think they were happy to be back in pond where they have a much bigger space to swim!!

It really was starting to come together and I was loving the look!!!


Once everything was in place it was time to finish up a few little details to make it complete!!!

We purchased a 1000 pound bag of sea rocks for around $35 to use to fill in the area around the pound for now instead of doing flowers at the time, which I really do think was a great choice because they looked amazing!!!  

We had the lantern looking thing, the birdbath, AND my husband built me a little bridge to go across it (for looks).


We even decided to add a light inside the lantern to allow it to be seen at night!  I really liked the way it looked at night... it really turned out beautifully when it was finished!!!  Don't you think so?


So... I promised I would tell you all why the white liner wasn't the best idea; so, hear it goes....

Monday, March 7, 2016

Papa's Garden Destroyed in the Storm!

When we finish the fish pond it was beautiful and all I wanted.

*If you missed how we got here, you can check it out at
http://believeinnewme.blogspot.com/2015/12/building-fish-pond-final-steps.html

However, not long after it was complete (May 2011) Hurricane Irene came through and really messed it up for us!!  It uprooted some tree's and unfortunately the roots from a Pine tore and punctured the liner.


Therefore, Papa's Garden was destroyed and we have to redo it all over again... ugh!  BUT at least that was the only thing that was destroyed... it could have been worse!!

A few tree's down can be taken care of.. thankful we didn't have any damage to our family, home, or cars.... However, we did have to suffer without power for 4 or 5 days, which really sucked as hot as it was!!


Temporarily, we had to do something to the pond so that our fish didn't die; but it looked  like a hott-mess for a little while as you can see here  >>>>>>>>>>>>>>>>>>>>>>>>>>>>>>>>>>>


This version unfortunately never went much further than what you see because of limited time and finances; and stayed this way for a little too long (in my opinion).  However, when it finally got a makeover it was so PRETTY!!!


... I'm a little short on time tonight to share it, but I will share that with you all tomorrow night!!

Until then ~Ginny

Thursday, December 17, 2015

Building a Fish Pond: The Final Steps

In the last post on building a fish pond we discussed  Installing the Liner, which is an important part.  Once your pond is full of water you will need to secure the edges of the liner in some way and do any last details you wish as you finish up building your fish pond!

The first time that we built the fish pond we used the huge staple looking things in the out door section at Lowe's (sorry I do not recall what the name of this product was).    We trimmed the edges of the plastic we had rolled out and them installed the staples as directed on the package.  I really loved this look of our Fish Pond Garden!!


Below is a picture of the edge of the fish pond at our pump house.  I plan to use the circle decorative rocks to circle around it with a top and a hanging bucket... later on.

I took the picture below as the "before" because we were adding a waterfall and flowers around the well house in the 1st plan to build the fish pond.


The flowers really bloomed the so pretty and bright the first year.. I took so many pictures to share!


Unfortunately, I could't find a picture that had the waterfall installed in the version using the staples to outline.  However, I did find one that shows it when we redone the pond the second time.  We kept the plastic (liner) large in this version to fill in with rocks...  It's all in how you want it to look; and I wanted it to be different since we didn't have a choice in redoing it!  Someone's dog tore the plastic with it's nails and all our water was going out... couldn't let my fish die!


Sadly... This version never really got finished because Hurricane Irene came through and knocked down a Pine Tree, which tore everything up.


We were upset, but the pond can be fixed.. it could have been worse!!  Gave me a chance to brain storm the next version a little ....


~Until next time!


Friday, November 27, 2015

Building a Fish Pond: Putting the Liner In


The LINER is an important part of building a fish pond.  If you're doing a plastic type liner as we originally did, you may need a couple of people to help you keep the liner straight or heavy objects to help secure sides.

We used a 7mm black plastic for the pond in this process.. You can purchase it at your local Lowe's (which is where we got ours) or anywhere else that may carry it. **The Black plastic worked better for us, we used the Clear plastic once and the sun dry-rotted it really fast!!

Here is what we did ...

   First, roll out the plastic well past the length of your pond, it has to go down into the hole and still have enough remaining to cover the edges.  If you are planning to plant a flower garden surrounding your pond, then roll extra to assure you can cover that space as well (it will help keep grass and weeds from growing in as much).  Don't worry, if you have too much you can cut it when you are finished; but it won't be good if there isn't enough because you will have to start over (and that is wasting money).

  Once you have the size you need laid out, cover the hole; making sure that their is the same amount of space on each side (as close as possible).  Have something their that you can hold down sides, if needed!  When we were doing this stage the wind started blowing pretty hard and it kept trying to blow our plastic away (lol).  We used our big rocks to hold down the four corners, but allowing the plastic to hang down in the hole a little.

After you have everything in place, you are ready to start filling your pond!  Once you have begun filling your pond, you should try to keep the plastic as smooth as possible.  This can be difficult depending on the design of your pond!  Our's was designed with a step on one side, so we had to make sure it did not look bunched up in that area... it was a small challenge.

We have well water; therefore, we stopped about half way through this process because we hadn't had a good rain in a few weeks.  If we ran the water too long we could take the chance of starting to get a dingy water look ... we didn't want that.

When your pond is full, it is time for you to decide how you want the outer layer to look.

**Will you be planting flowers around the border?Filling with rocks? or Cutting around the border?


The first time we went with cutting around the border of the pond (as you see below).


If you decide to go this way.. As we did!  You will need something to secure the boarder of your pond.

We purchased a pack of what looked to be huge staples (lol) from Lowe's; and that is what we used to secure the plastic all the way around the pond.

I actually loved this look!!


Once, you have secured the liner (plastic) the way you have chosen; you have completed this step and your pond! :)

You can wait until this step is completed to add your fish or you can put them in once the pond is full of water.. it's up to you!!  Just make sure you leave them in their bag or whatever the pet store put them in, to allow your fish to be adapt to the the temp before releasing them into your pond.

*This precaution will hopefully prevent loosing any fish!!


Tuesday, November 24, 2015

Building a Fish Pond: Getting Started

Here is some information from an old blog, "Papa's Garden"  that I thought I would share with you all this week.  Hope you all enjoy...

About 4 years ago, my husband came home from work and said that he wanted to put a Fish Pond in our yard; and he had a plan of what he wanted.  We already had a small hard plastic garden in the front yard by the rose bushes, but he did not want to put it in the same spot. The plan was to fill in the current pond and decide on a new location.

After some thinking & planning we picked the spot we wanted to put the new one at.  I could picture incorporating the pump house into a small wishing well which would look amazing beside the fish pond, surrounded with a beautiful combination or flowers.  **I have an old bucket that's going to look awesome hanging in it!!  BUT it all had to get finished first!!  So, it was time to get started!

First off we had to get an outline of what we wanted.. This is my husband digging a small chunk of the shape of Fish Pond..


Sure am glad that this was his idea.. so I didn't have to hear about it the next hour or so ((lol))!**This took a while!  But he got some help!  :)


Once it was the depth that we wanted it.  We had to make sure it was cleaned out the best as it could be so that the liner didn't get punctured by any roots and there weren't big clumps of dirt!  If you are planning to build your own, know that this is quite time consuming!!


Finally, it was cleaned out the best it could be.  Sorry the picture is blurry!  Now it is time to get it lined with the liner of your choice and get your fishy's swimming!!  :)


Next Step: 

Step #2  Adding the Liner:  


Sunday, November 22, 2015

Blog News: Whats ahead next week!?

Over the past few years I have started MANY different forums and blogs about a variety of topics, but over the past year I have focused more on only 2 of them,  "A new Me" & "Life".  Therefore, I decided to take some of that information, update it, and more it to one of these blogs; deleting all the old content as I go.

I decided that I would share one topic at a time over a few days or the week to keep information flowing and posts not so long!!  Hope you all like it and come back to read more... and of course share your journeys as well!!  (We always love to hear what you think)

Next week I plan to share posts from an old blog, "Papa's Garden" with you all.  These are post about how we decided to build our very first fish pond in our yard and the things that we learned along the way... the good, bad, and ugly of the whole process!!

We really loved doing this and I hope you all will love it too; and learn how to do your own if you'd like along the way!!


>> Building a Fish Pond: Getting Started


Wednesday, July 22, 2015

Garden Update


These are some of the sunflowers that came out of my garden. I actually made up some vases and gave them to friends and family. 

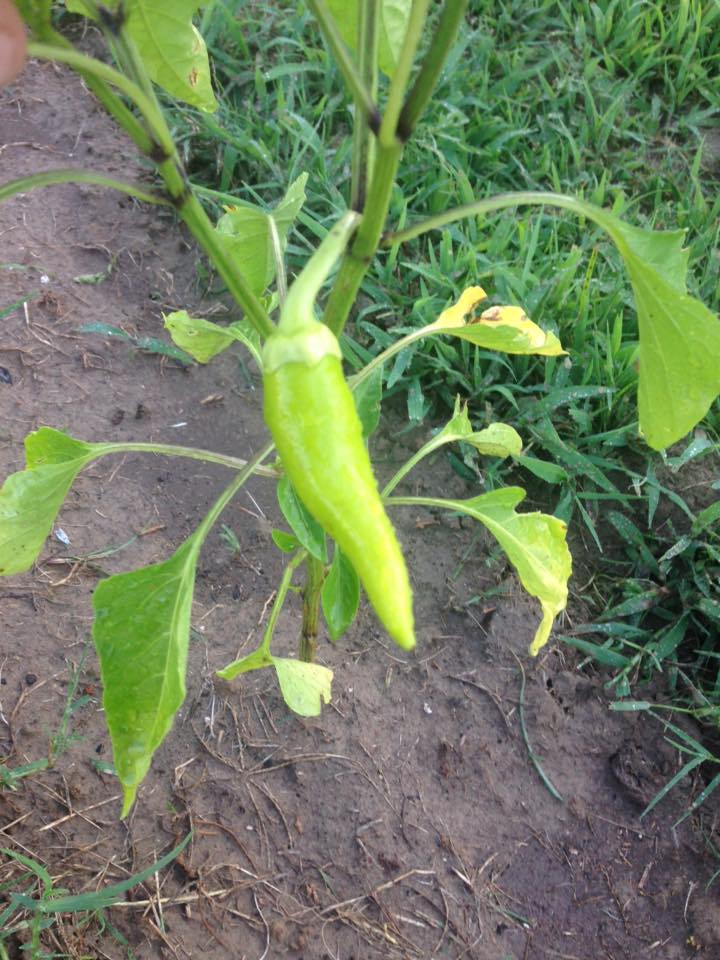
Here is some of my snap beans and sweet peppers that I picked yesterday. 

In my garden I had to pull out the squash because they were beginning to mold and I pulled all my cucumbers and then pulled those plants up because it was killing my tomatoes. So now I have peppers, tomatoes, corn, snap beans and butter beans. 

Friday, June 26, 2015

Flowers are Blooming Beautifully


The flowers around my pond have really taken it over.. They are blooming Beautifully!!
 I love all the colors and they are a beautiful sight from the window!!  

I am so glad that I decided to start this garden and try growing flowers.  I've never had a green-thumb, so I needed something easy (lol)  These flowers are perfect, they grow all by themselves and return every year (so-far).

I'm amazed how the new blooming Tiger Lilies have taken the color from the daisies I had previously planted in the flower-bed.  Hoping they multiply enough to separate into the orange!!  I plan to add the reddish color ones that I have seen in other's yards, making it a colorful pleasure!!  


I hate that soon all the flowers will fall off and it will be a bed of greenery, but hoping to add some Summer blooming flowers to add color longer!!!


Wednesday, June 17, 2015

JoAnne's Garden


My garden is growing and I have veggies on the vines now. Here are a few pictures. 


As you can see in the above pictures, I have some peppers growing and they look pretty good. 


This is the picture of my squash, and I have several more blooms on the vine. 


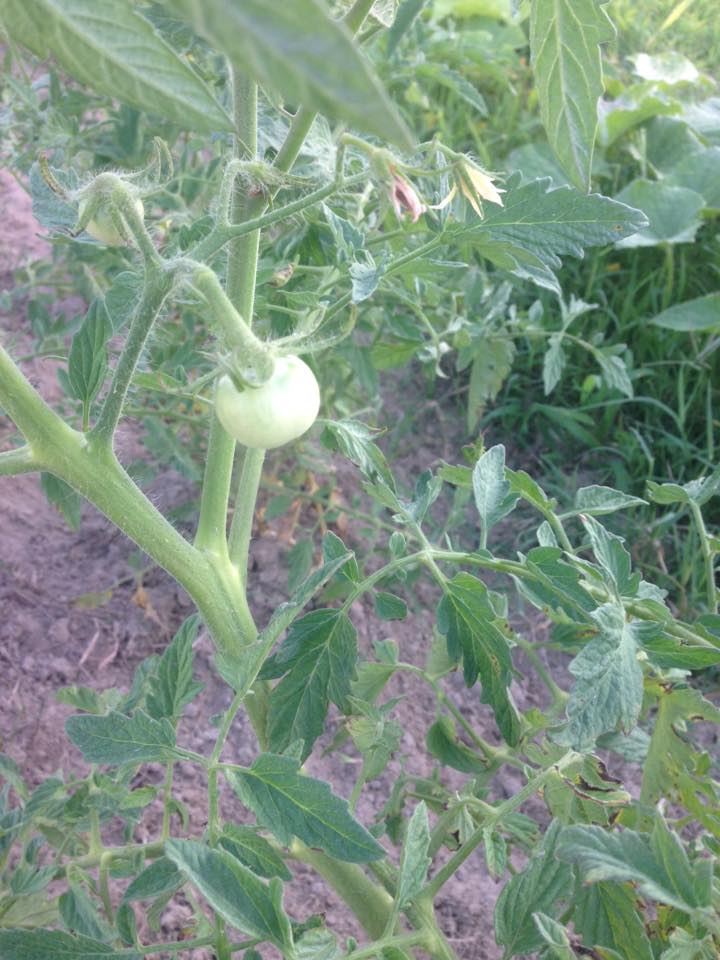
And these babies are my tomatoes. I have at least two or three on each plant and some more blooms. So they are growing good. 


This is a long shot of my garden. I have been trying to keep the grass out from around the plants at least, but it is a job. 


*****Clip art at top of page link - http://www.stjohnsji.co.uk/school-clubs-1/gardening